

How to add the "Transfer Ownership" function to any ThirdWeb Solidity Smart Contract
Step-by-Step Guide to Incorporating the 'Transfer Ownership' Function into ThirdWeb Solidity Smart Contracts


Introduction
I was recently contacted to redesign the NFT staking smart contract due to the poor design and user experience of the website. While working on the project for two days, I came across a bug that was impossible to solve. The reason for this is that once smart contracts are deployed, they cannot be tampered with anymore. Although they can be upgraded, upgrading the smart contract, in this case, was not possible. So, I had to take it upon myself to deploy a new NFT staking smart contract. You may be wondering how I, as a front-end developer, was able to write smart contracts. Well, with ThirdWeb, deploying smart contracts is made very easy with little or no prior experience required.
After deploying the staking contract, I needed to transfer the ownership of the contract to my client. However, I discovered that Thirdweb did not include this function in their staking contract. I explored Thirdweb's documentation and found a way to add a transfer ownership function to any Thirdweb contract. In this tutorial, I will be showing you how to add this function. So, fasten your seatbelt, and let's embark on this journey.
Let's get started:
What is the transfer ownership function and why is it important?
In Solidity smart contracts, the transfer ownership function is a method that allows the current owner of a contract to transfer ownership to a new address. This is important because ownership of a contract can dictate who has the ability to change certain variables or execute certain functions within the contract.
For example, imagine a simple contract that allows users to vote on a particular issue. The owner of the contract may have the ability to add new options for users to vote on, change the voting deadline, or even close the voting entirely. If the ownership of the contract is transferred to someone else, they would then have control over these actions.
By including a transfer ownership function in the contract, the original owner can transfer ownership to a trusted party if they no longer wish to manage the contract. This can help ensure that the contract remains secure and functional even if the original owner is no longer involved.
When any why should I add a transfer ownership function in my code?
You should consider adding a transfer ownership function to your Solidity smart contract if you want to provide a way for the current owner of the contract to transfer ownership to a new address. This function can be useful in a variety of scenarios, such as:
Delegating ownership: The original owner of the contract may want to delegate ownership to someone else, such as a co-founder or a trusted party, to help manage the contract or the associated project.
Changing ownership during an acquisition: If the contract is associated with a project or business that is being acquired by another party, the ownership of the contract may need to be transferred to the new owner.
Preparing for unexpected events: If the original owner of the contract becomes incapacitated, passes away, or is otherwise unable to manage the contract, a transfer ownership function can be useful for ensuring that the contract can continue to operate and be maintained by another trusted party.
It's important to carefully consider the use cases for a transfer ownership function before implementing it, as it can grant significant power to the new owner of the contract. Additionally, the transfer of ownership function should be implemented securely to prevent unauthorized access or misuse.
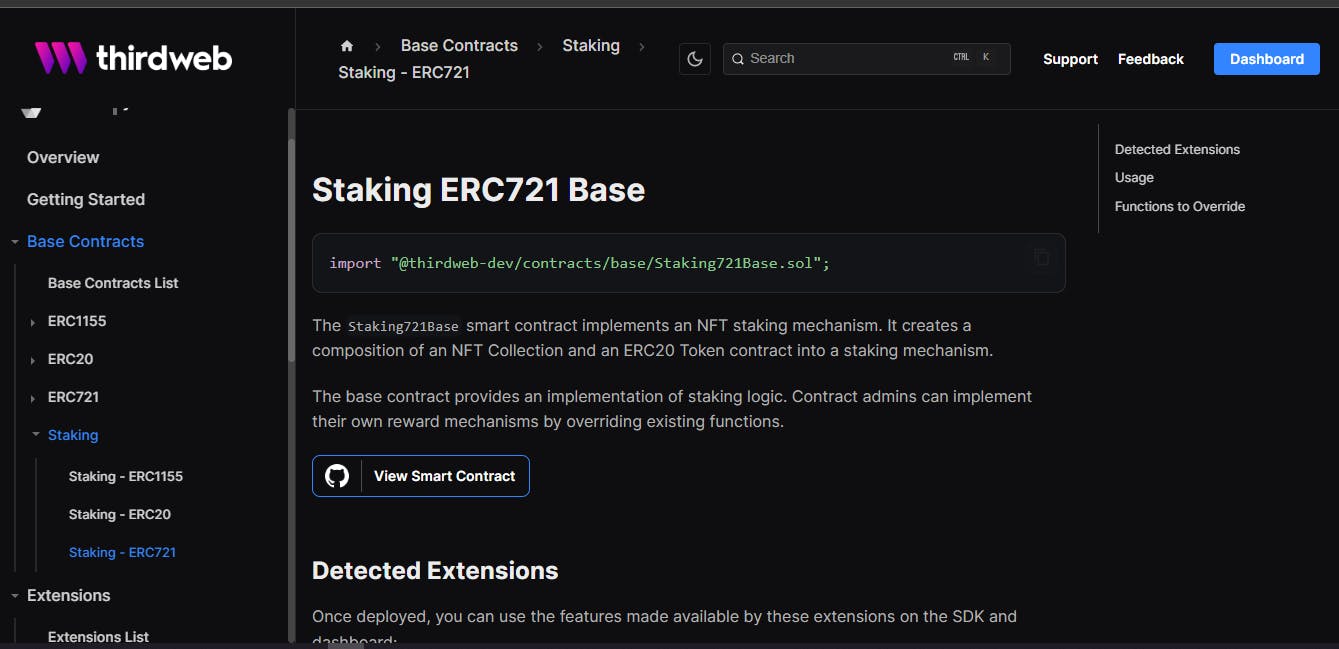
To begin this tutorial, let's delve into the world of ThirdWeb contracts and examine an ERC721 staking contract.
Steps to create and deploy on ThirdWeb
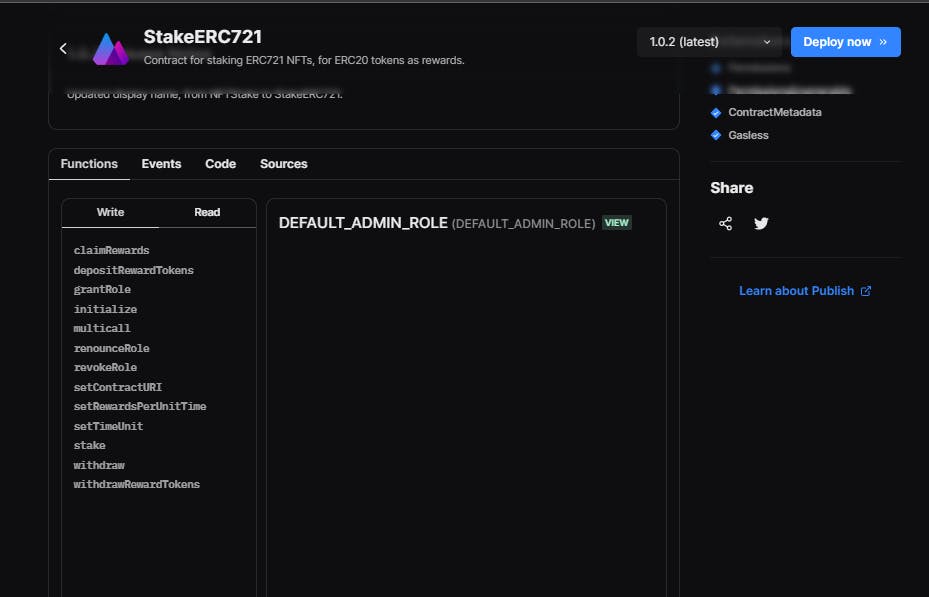
To begin, visit https://thirdweb.com/explore/staking and select the option to StakeERC721.

Upon scrolling down slightly, a section is visible displaying all the functions included in the contract. However, the transfer ownership function is absent from this list.
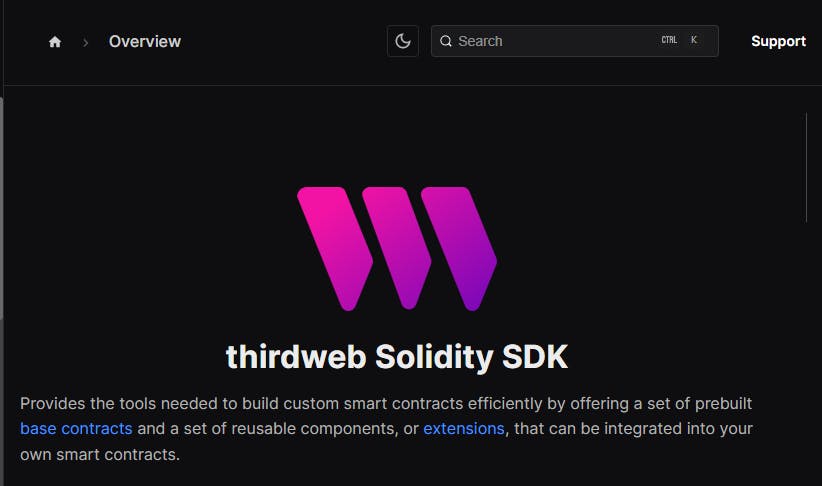
Let's dive right into it! To include a transfer ownership feature to the ThirdWeb smart contract, we should check out their documentation, which is easy to understand and clear. ThirdWeb has already done the majority of the work, and I admire and appreciate their efforts. Take a closer look at the overview of the ThirdWeb Solidity SDK—it's worth it!
To get started with the Solidity SDK, run the following command to create a new project:
npx thirdweb create contract
After finishing the initial steps, go to the contract folder and make a new document named thirdwebstaking.sol Next, click on "staking" under the main contract and choose Staking-ERC721 from the menu on the side.
Now, you need to copy and paste the code that's written below into the file that you've just created.
// SPDX-License-Identifier: MIT
pragma solidity ^0.8.11;

import "@thirdweb-dev/contracts/base/Staking721Base.sol"; // Import the Staking721Base contract from a third-party library

// Define the MyContract contract and inherit from Staking721Base
contract MyContract is Staking721Base {
    constructor(
        uint256 _timeUnit, // Parameter for the time unit used for rewards
        uint256 _rewardsPerUnitTime, // Parameter for the rewards amount per time unit
        address _stakingToken, // Address of the token being staked
        address _rewardToken, // Address of the token being used as a reward
        address _nativeTokenWrapper // Address of the contract used to wrap native tokens
    )
        Staking721Base(
            _timeUnit,
            _rewardsPerUnitTime,
            _stakingToken,
            _rewardToken,
            _nativeTokenWrapper // Pass parameters to the constructor of Staking721Base
        )
    {}
}
Now let's add the transfer ownership function by including The Ownable smart contract extension is usable with any base smart contract. It lets you set an owner for your smart contract.
Let's give our smart contract a new function that allows us to transfer ownership. We can do this by using a special tool called "The Ownable Smart Contract Extension.". This tool works with any basic smart contract and allows us to choose who the owner of our smart contract is.
// SPDX-License-Identifier: MIT
pragma solidity ^0.8.11;

// Import the Staking721Base contract from a third-party library
import "@thirdweb-dev/contracts/base/Staking721Base.sol";
// Import the Ownable contract from a third-party library
import "@thirdweb-dev/contracts/extension/Ownable.sol";

// Define the MyContract contract and inherit from Staking721Base
contract ThirdwebStaking is Ownable, Staking721Base {
    // Constructor function with parameters
    constructor(
        uint256 _timeUnit, // Parameter for the time unit used for rewards
        uint256 _rewardsPerUnitTime, // Parameter for the rewards amount per time unit
        address _stakingToken, // Address of the token being staked
        address _rewardToken, // Address of the token being used as a reward
        address _nativeTokenWrapper // Address of the contract used to wrap native tokens
    )
        // Call the constructor of Staking721Base with the given parameters
        Staking721Base(
            _timeUnit,
            _rewardsPerUnitTime,
            _stakingToken,
            _rewardToken,
            _nativeTokenWrapper
        )
    {}

    function _canSetContractURI()
        internal
        view
        virtual
        override
        returns (bool)
    {
        return msg.sender == owner();
    }

    // Function to get the owner of the contract
    function getOwner() public view returns (address) {
        return owner();
    }

    // Function to check if the caller is the owner of the contract
    function _canSetOwner()
        internal
        view
        virtual
        override(Ownable, Staking721Base)
        returns (bool)
    {
        return msg.sender == owner();
    }
}
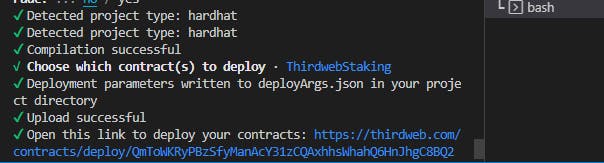
Now, let us deploy our code.
npx thirdweb deploy
Once deployed, ThirdWeb will provide you with a generated link. Simply click on that link to access the ThirdWeb dashboard.
By clicking on the link, you will be directed to a page similar to the one below.
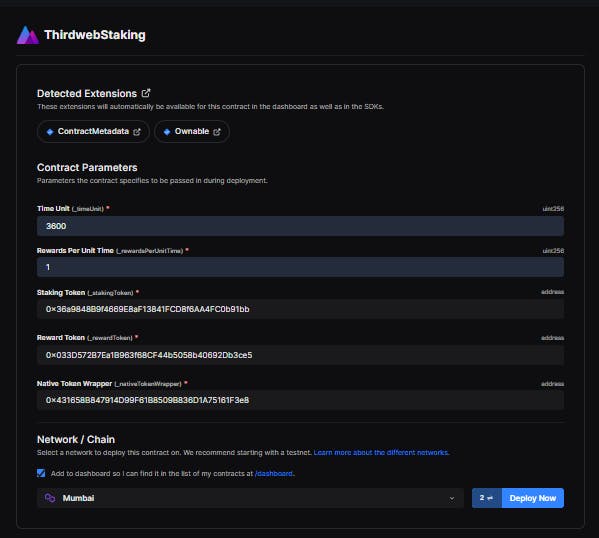
To initiate the deployment process, click on the "Deploy" button and proceed to sign the transaction.
For a staking contract, specific requirements such as the time unit (duration for reward distribution), rewards per unit time (amount of tokens to be distributed per time unit), staking token (address of the NFT to be staked), and reward token (address of the token to be distributed as a reward) must be met to ensure successful deployment of a robust smart contract. It's important to note that these requirements may vary depending on the type of contract you intend to deploy.
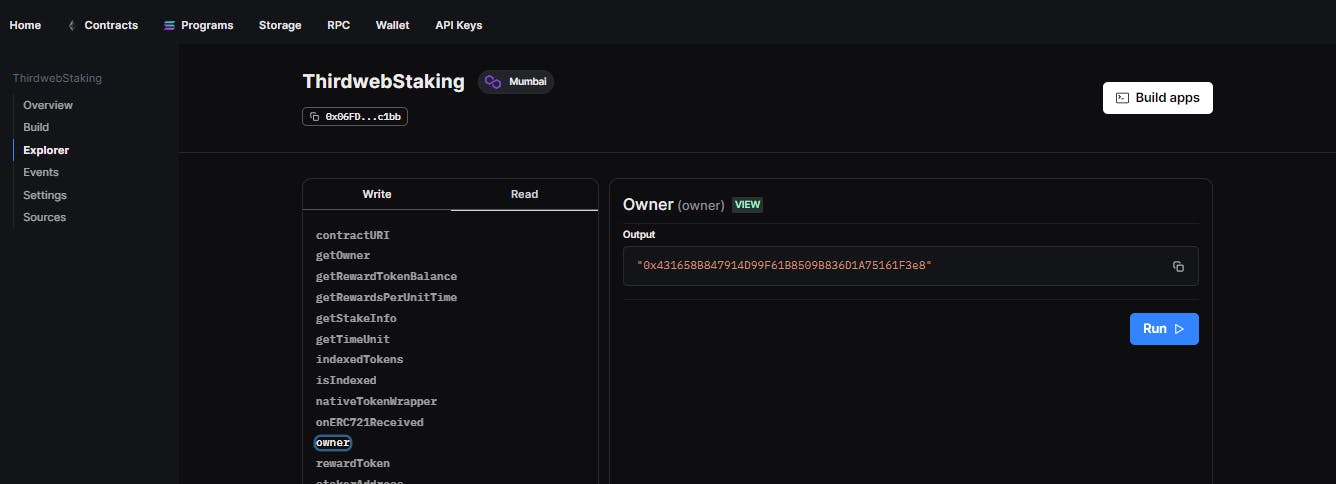
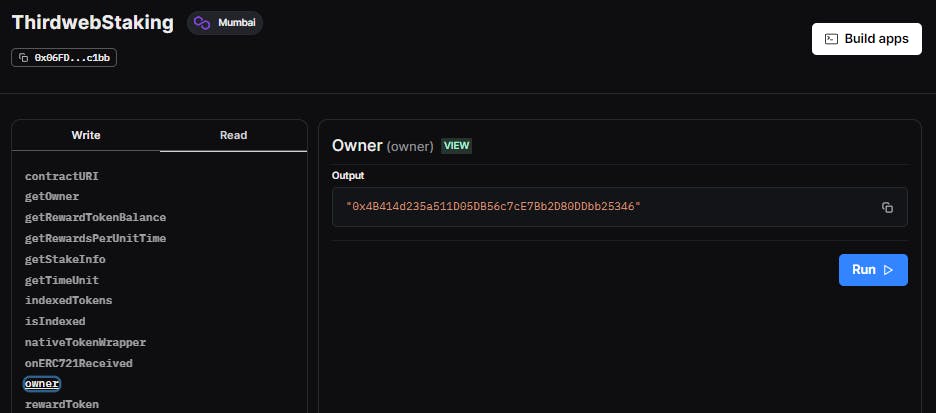
You have the option to utilize the dashboard explorer to examine the website owner, which corresponds to the address responsible for deploying the website.
Let's say that the client's address is "0x431658B847914D99F61B8509B836D1A75161F3e8" and after successful deployment, you wish to transfer the contract's ownership to your client. The initial step involves clicking on "Explorer" and then selecting the "setOwner" function. You can then proceed to input the address(es) to which you want to transfer ownership of the contract.
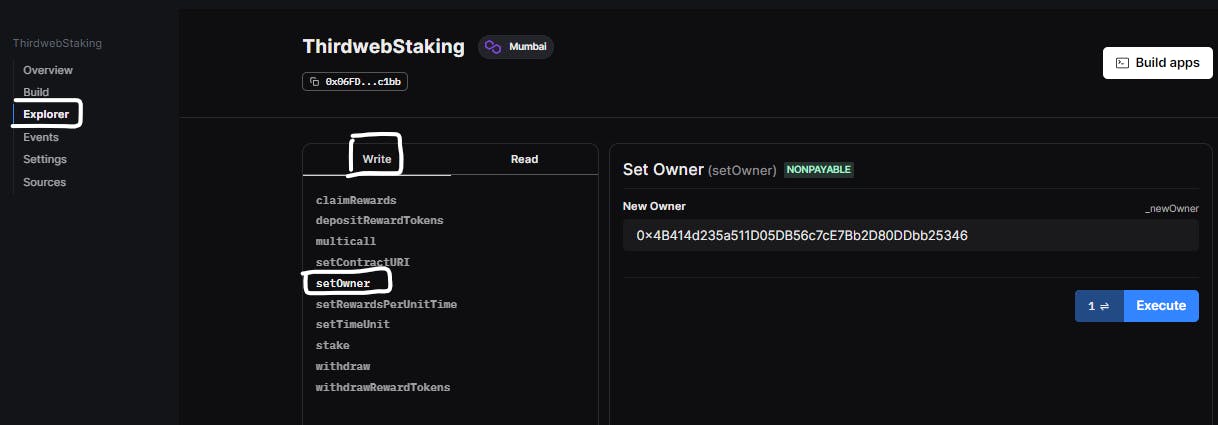
Here is the new address to which I transferred ownership of the contract.
Conclusion
To enhance your access and interaction with decentralized applications built on different networks, incorporating important functions like "ownable" into the ThirdWeb contract can be a critical step. By following the step-by-step guide provided in this article, you can effortlessly explore the full potential of ThirdWeb.
It's worth noting that ThirdWeb provides extensive support for front-end development and Web3 integration. Along with the subject discussed in this article, ThirdWeb offers valuable resources on smart contracts, IPFS integration, and other related topics. Be sure to keep an eye out for upcoming articles that will provide detailed coverage of these areas, enabling you to elevate your front-end development abilities to the next level in the Web3 world.