How to Add Fantom and the Fantom Testnet Network to Your Metamask: A Step-by-Step Guide
Explore the Exciting World of Fantom: A Beginner's Guide to Adding Fantom and Fantom Testnet to Your Metamask Wallet


Introduction:
If you're eager to explore the exciting world of Fantom and dive into its array of dApps, adding the Fantom network and Fantom Testnet to your Metamask wallet is your crucial first step. In this user-friendly guide, we'll take you through the process of adding both networks to your Metamask wallet so you can effortlessly explore everything Fantom has to offer.
Step 1: Install the Metamask Extension
To add the Fantom network to your Metamask wallet, you must first have the Metamask extension installed on your browser. You can easily download it from the official website and follow the straightforward instructions for installation in your preferred browser.
Step 2: Open Your Metamask Wallet
Once you've successfully installed Metamask, you can open your wallet by simply clicking on the extension icon in your browser. You'll be prompted to either create a new wallet or import an existing one. If you have an existing wallet, you can import it by selecting "Import Wallet" and following the provided instructions.
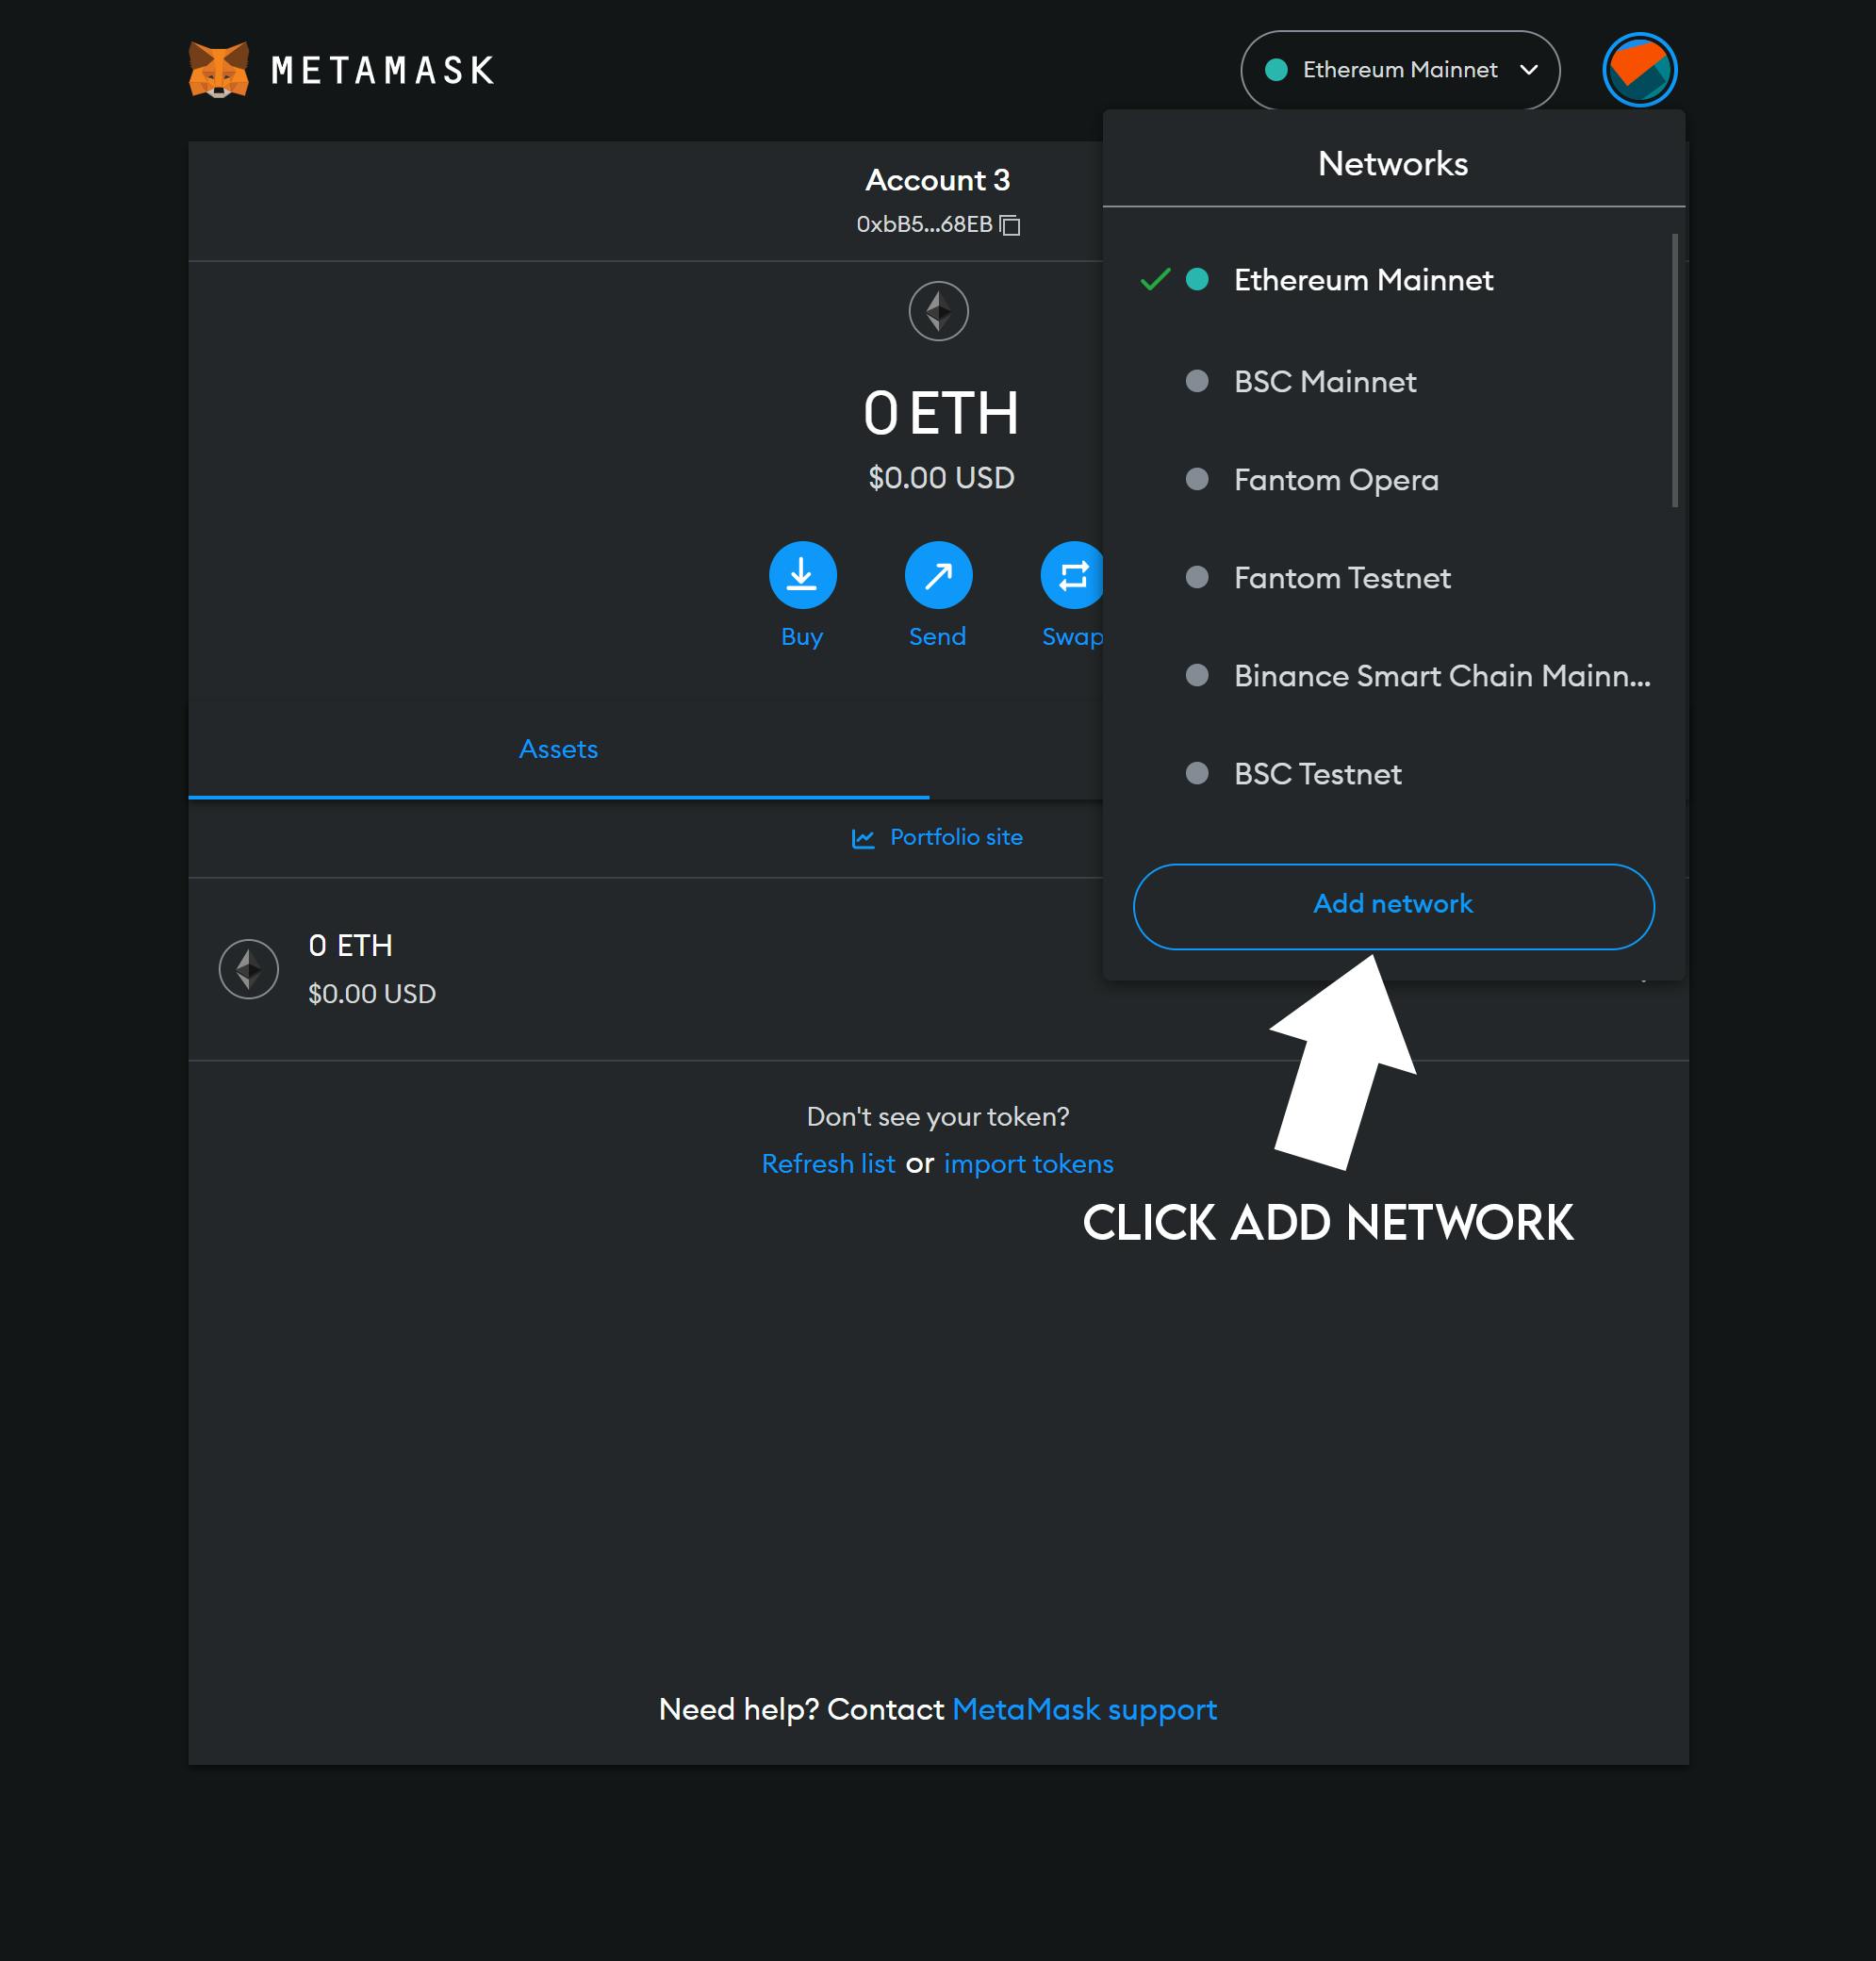
Step 3: Add Custom RPC Network
To add the Fantom network to your Metamask wallet, you need to add a custom RPC network.
Click on the network dropdown menu in the top-right corner of the Metamask window.

Click on the "Add Network" button in the Metamask window.
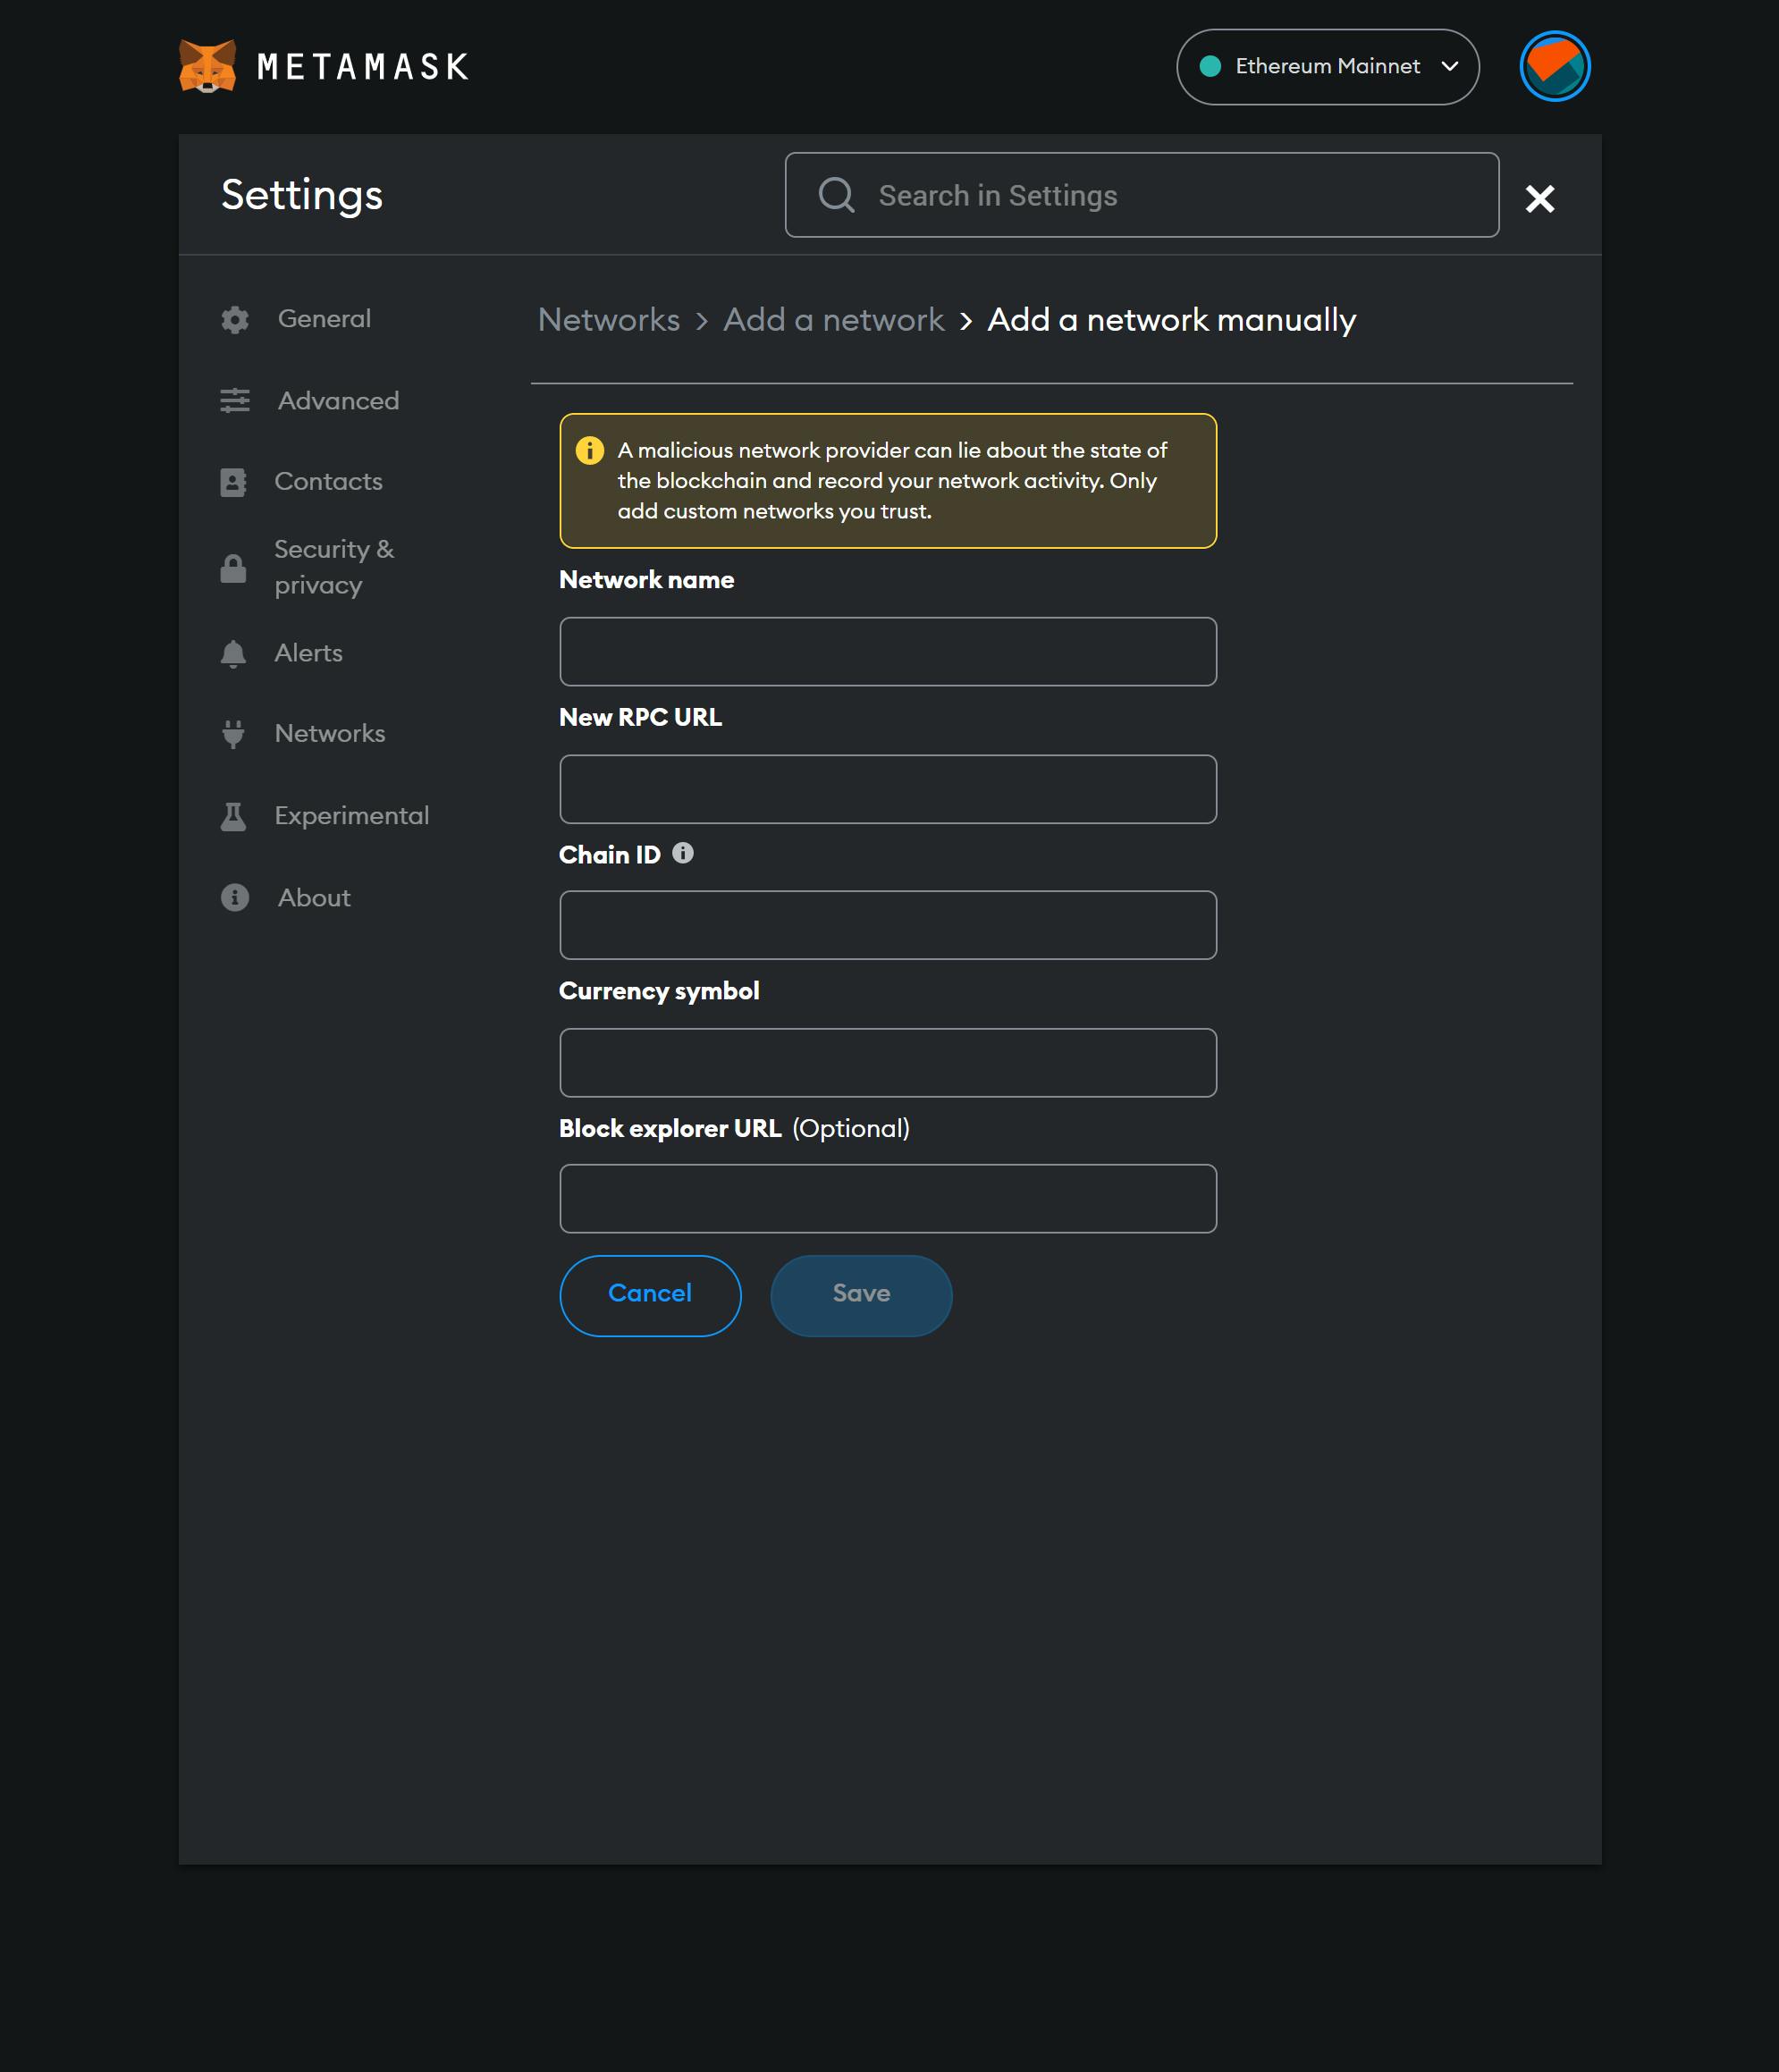
Click Add A Network Manually.

Step 4: Input the Fantom Network Details
In this step, you'll input the essential details for the Fantom network:
For the New RPC URL field, enter the Fantom network URL: rpc.ankr.com/fantom.
Input the network name as Fantom Opera and use FTM as the symbol.
Set the chain ID to 250.
Lastly, enter the block explorer URL as ftmscan.com.
Fantom Opera (Mainnet)
Network Name: Fantom Opera
RPC Url: https://rpc.ankr.com/fantom/
ChainID: 250
Symbol: FTM
Block Explorer URL: https://ftmscan.com/
Famtom Testnet
Network Name: Fantom Testnet
RPC Url: https://rpc.testnet.fantom.network
ChainID: 4002
Symbol: FTM
Block Explorer URL: https://testnet.ftmscan.com
Step 5: Save the Network
Once you've entered these details, simply click the Save button. Your Metamask wallet is now seamlessly connected to the Fantom network.

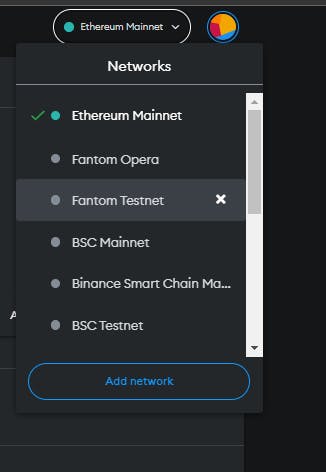
Step 6: Switch to Fantom Network
Metamask should automatically switch to the Fantom network after you click save. However, if it doesn't happen automatically, you can manually switch by clicking the network dropdown menu in the top-right corner of the Metamask window and selecting Fantom Opera or Fantom Testnet.
Congratulations! You're now ready to interact with a multitude of Fantom-based dApps and execute transactions on the Fantom network.
Conclusion
Adding the Fantom network to your Metamask wallet is a straightforward process that you can complete in just a few easy steps. With the Fantom network integrated into your wallet, you can seamlessly interact with various Fantom-based dApps and conduct transactions on the network. If you encounter any issues or have specific questions related to Web3 and frontend development, please feel free to reach out. I'm here to assist you in any way I can. For more valuable tips and tutorials on Web3 and front-end development, be sure to follow our updates. Thank you for taking the time to explore this guide.