How to integrate RainbowKit and WAGMI in Next.js
Learn how to use the RainbowKit and WAGMI libraries to build a Next.js app that connects to a wallet and displays account and network information.

Hi, there! I'm a front-end developer with a passion for web3 and blockchain development. I specialize in using technologies like Next.js, React, JavaScript, Ethers.js and SCSS to create beautiful and interactive user interfaces. Originally from Nigeria, I've worked with clients from all over the world to build modern and engaging websites and applications. When I'm not coding, you can usually find me reading up on the latest developments in the world of blockchain or exploring new technologies to incorporate into my work. Let's connect and create something amazing!
Introduction
This tutorial will guide you through the process of integrating WAGMI and RainbowKit to add a sign-in feature to your web3 dapp using TypeScript and Next.js. We'll create a basic application that allows users to sign in and displays their address, profile ID, and signature once authenticated. You should have some basic knowledge of TypeScript and familiarity with Next.js before following along with this tutorial. If you want to see the code for the application immediately, you can find it on GitHub.
What is WAGMI

WAGMIis a tool that helps developers work with Ethereum by providing a set of React hooks. It makes it easy to perform tasks like connecting to a wallet, displaying balance and ENS information, signing messages, and interacting with contracts.
What is RainbowKit
RainbowKit is a tool that simplifies the process of adding a wallet feature to your application. It's fast, customizable, and takes care of the complicated aspects of wallet integration so that developers and teams can focus on creating great products and communities for their users.
RainbowKit offers some amazing features:

Pre-requisites
We recommend you have the following tools installed before you begin:
How to integrate Rainbowkit and WAGMi in Next.js in 4 Steps
Step 1
Install Next.js
npx create-next-app@latest
Once the installation process is complete, you can launch your Next.js application by typing "npx run dev" in your terminal. Then, simply navigate to http://localhost:3000 to access your application.

Step 2.
To establish a connection between our app and the blockchain, it is necessary to install additional libraries and configure them accordingly.
npm i wagmi ethers@^5
Install RainbowKit
npm i @rainbow-me/rainbowkit
We have now finished installing all of the necessary libraries to build our app.
Step 3
In this tutorial, WAGMI and RainbowKit configuration in the_app.jsx file is one of the most important steps.
Open your app.jsx file in your root folder and replace it with the code below
import React from "react";
import "../styles/globals.css";
import "@rainbow-me/rainbowkit/styles.css";
import { getDefaultWallets, RainbowKitProvider } from "@rainbow-me/rainbowkit";
import { configureChains, createClient, WagmiConfig } from "wagmi";
import { publicProvider } from "wagmi/providers/public";
import { polygonMumbai } from "wagmi/chains";
import { jsonRpcProvider } from "wagmi/providers/jsonRpc";

// Configure the blockchain providers and chains to use
const { chains, provider } = configureChains(
  [polygonMumbai], // Use the Polygon Mumbai test network
  // [publicProvider()] // Use a public provider to connect to the network
  [
    // Use a JSON-RPC provider to connect to the network
    jsonRpcProvider({
      // Check if the chain ID matches the Polygon Mumbai test network
      rpc: (chain) => {
        if (chain.id !== polygonMumbai.id) return null;
        return { http: chain.rpcUrls.default };
      },
    }),
  ]
);

// Get the default wallets for the specified chains
const { connectors } = getDefaultWallets({
  appName: "Wagmi Tutorial", // Specify the name of the app
  chains, // Use the configured chains
});

// Create a Wagmi client to interact with the blockchain
const wagmiClient = createClient({
  autoConnect: true, // Automatically connect to the provider
  connectors, // Use the specified connectors to connect to the chains
  provider, // Use the specified provider to connect to the network
});

// Export the App component as the default export
export default function App({ Component, pageProps }) {
  return (
    // Set up the Wagmi configuration for the app
    <WagmiConfig client={wagmiClient}>
      {/* Set up the RainbowKit provider for the app */}
      <RainbowKitProvider chains={chains}>
        {/* Render the specified component with its page props */}
        <Component {...pageProps} />
      </RainbowKitProvider>
    </WagmiConfig>
  );
}
Step 4
Open your index.jsx file and let us test our app
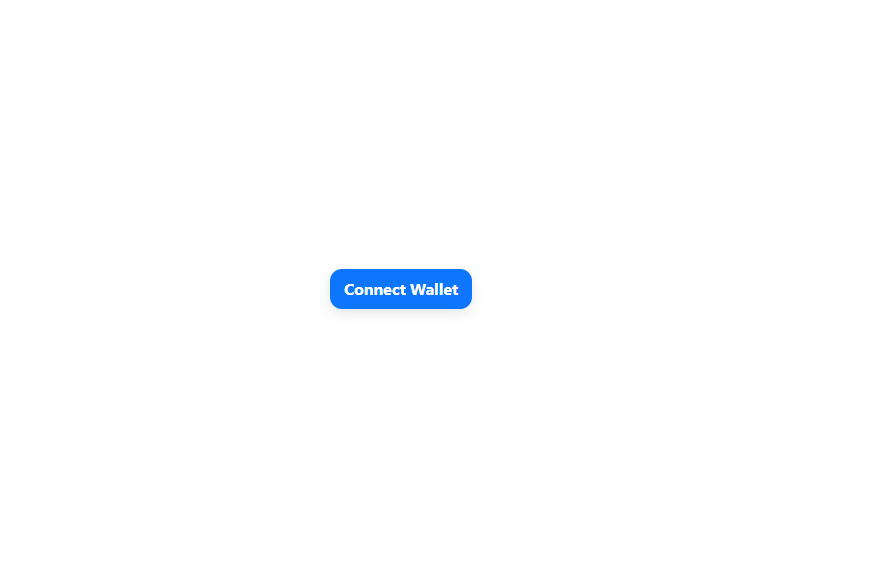
First of all, we want to test our rainbowKit"Connect Button."index.jsx
import React, { useState, useEffect } from "react";
import { ConnectButton } from "@rainbow-me/rainbowkit";


export default function Home() {
  return (
    <div className="container">
      <ConnectButton />
    </div>
  );
}
Click "Connect Wallet"
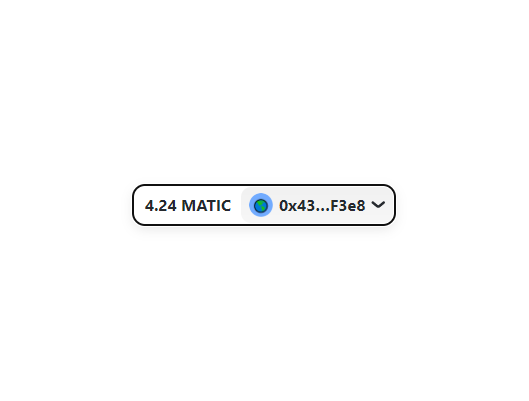
This modal would appear after you've clicked "Connect Wallet." Choose any of your preferred wallets to connect to the blockchain.

After a successful connection, RainbowKit would display your wallet balance, wallet address, and wallet network.
Let's proceed to add some features and use WAGMI hooks.
We would use four different kinds of WAGMI hooks. To learn more, visit their documentation.
The code below should be included in your index.jsx file.
import React, { useState, useEffect } from "react";
import { ConnectButton } from "@rainbow-me/rainbowkit";
import { useConnect, useBalance, useAccount, useNetwork } from "wagmi";

// Define a functional component called Home that displays information about the user's account, balance, and network connectivity status
export default function Home() {
  // Use the useAccount hook to get the current user's address, active connector, and connection status
  const { address, connector: activeConnector, isConnected } = useAccount();

  // Use the useConnect hook to get the list of available connectors
  const { error } = useConnect();

  // Use the useNetwork hook to get information about the current chain and available chains
  const { chain, chains } = useNetwork();

  // Use the useBalance hook to get the user's balance information
  const { data } = useBalance({
    address,
  });

  // Use the useState and useEffect hooks to track whether the component has mounted or not
  const [hasMounted, setHasMounted] = useState(false);
  useEffect(() => {
    setHasMounted(true);
  }, []);

  // If the component has not mounted yet, return null
  if (!hasMounted) {
    return null;
  }

  // Render the component with the following elements:
  return (
    <div className="container">
      {/* Display a button to connect to a wallet */}
      <ConnectButton />

      {/* Check if the user is connected to a wallet */}
      {isConnected ? (
        <h2 className="activeConnector">
          You are connected to <span>{activeConnector?.name}</span>{" "}
        </h2>
      ) : (
        <h2>Not Connected</h2>
      )}

      {/* Display the user's balance */}
      <section className="Balance">
        <h3>
          Balance:{" "}
          <span>
            {Number(data?.formatted).toFixed(3)} {data?.symbol}
          </span>
        </h3>{" "}
      </section>

      {/* Display information about the current chain */}
      {chains && (
        <div className="Current_chain">
          Current Chain:
          {isConnected ? (
            <span> {chains.map((chain) => chain.name)}</span>
          ) : (
            "Connect Wallet"
          )}
        </div>
      )}

      {/* Display any errors that occur */}
      <p className="error">{error && <span>{error.message}</span>}</p>
      {/* End of component */}
    </div>
  );
}
CSS
.container {
  display: flex;
  justify-content: center;
  align-items: center;
  flex-direction: column;
  padding-top: 5em;
  text-align: center;
}

.container>* {
  margin: auto;
  padding: 1em;
}

.activeConnector {
  font-size: 1.2em;
}

.activeConnector span {
  color: blueviolet;
  text-transform: capitalize;
}

.Balance h3 {
  font-size: 1.3em;
}

.Balance span {
  font-size: 1em;
  color: blueviolet;

}

.Current_chain {
  font-weight: 600;
  font-size: 1.2em;
}

.Current_chain span {
  color: blueviolet;
  font-size: 1em;
}
.error{
  color: red;
  font-weight: 00;
}
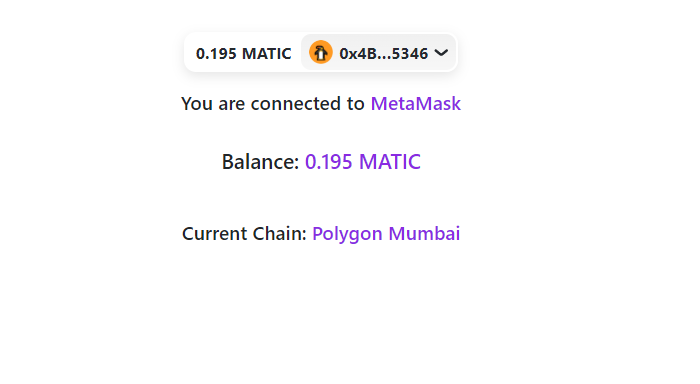
This is the final result.
Conclusion
In summary, combining Rainbowkit and WAGMi with Next.js can help you access and interact with decentralized applications across various networks. By following the guide, you can easily set up your app to connect and interact with different blockchains, allowing you to switch networks, test your applications, and improve the user experience on your website.
Furthermore, WAGMi and Rainbowkit offer valuable tools for front-end development and Web3 integration. You can anticipate more articles on these subjects to help you hone your Web3 application development skills.
If you enjoyed this article and want to learn more about WAGMI Hooks and RainbowKit, check out these recommended links: